ป้ายกำกับ

วันจันทร์ที่ 7 ตุลาคม พ.ศ. 2562

แก้ปัญหา ติดตั้ง dropbox บน elementary 5.0 ไม่ Synce ข้อมูล ไม่แสดง icon บน wingpanel

ต้องไปติดตั้ง

elementary-indicators ก่อนนะครับ

โดยการ download .deb file มาก่อน


หรือเข้าไปที่ นี่ https://github.com/mdh34/elementary-indicators/blob/master/README.md

โปรแกรม จะถูกเก็บ ไว้ที่ folder Downloads
ทำการติดตั้ง ตามนี้ 

- กลับไปที่  home เราก่อน เข้า terminal ก่อนนะครับ กด ปุ่ม รูป windows+t จากนั้น พิมพ์ตามนี้ ใน terminal

cd กด ปุ่ม enter
cd Downloads

ทำการ ติดตั้ง โปรแกรม ตามนี้

sudo dpkg -i wingpanel-indicator-ayatana_2.0.3+r27+pkg17_ubuntu0.4.1.1_amd64.deb 

(ขึ้นอยู่กับ version ที่ download มาด้วย แนะนำ ให้ พิมพ์ sudo apkg -i wingpanel-indicator จากนั้นกดปุ่ม tab รายชื่อจะขึ้นมาเอง แล้วก็กด enter เพื่อติดตั้ง)

จากนั้น ติดตั้ง dropbox ที่ ทำมาสำหรับ elementary os โดยเฉพาะ โดยเข้า terminal พิมพ์
 
sudo apt-get install git
(ในกรณี ที่ยังไม่เคนติดตั้ง git มาก่อน)
git clone https://github.com/zant95/elementary-dropbox /tmp/elementary-dropbox
bash /tmp/elementary-dropbox/install.sh
(หากมีการ ติดตั้งมาก่อน ก็ให้ Uninstall ออกไปก่อน)
หลังติดตั้ง เสร็จ ให้ทำการ รีสตาทเครื่อง login dropbox หากไม่เจอปัญกา ก็จะมี icon ที่ wingpanel และ รอสักพัก ก็จะทำการ Synce ข่อมูลใน /home/deopbox
ปัญหาที่พบ ไม่ยอม synce ให้ login ผ่่านหน้า เว็ป dropbox เข้าไปที่ profile ความปลอดภัย ไปที่ device ลบเครื่องที่เคย sync dropbox ออกที่เราไม่เคยเข้าแล้วให้หมด 
จากนั้น boot เครื่องเราใหม่ ทำการ login dropbox ก็จะสามารใช้งานได้

วันอังคารที่ 13 กุมภาพันธ์ พ.ศ. 2561

ติดตั้ง tahoma ฟ้อน บน ubntu

wget -c http://hezardastan.sourceforge.net/persianfonts/tahoma.tar.gz
wget -c http://hezardastan.sourceforge.net/persianfonts/bfonts.tar.gz
sudo mkdir /usr/share/fonts/truetype/ttf-persian-fonts
sudo tar zxvf tahoma.tar.gz -C /usr/share/fonts/truetype/ttf-persian-fonts
sudo tar zxvf bfonts.tar.gz -C /usr/share/fonts/truetype/ttf-persian-fonts
sudo fc-cache -f -v

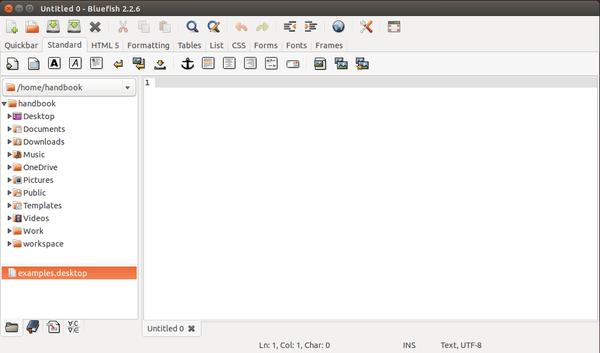
ติดตั้ง Bluefish Editor ตัวล่าสุด บน ubuntu 14.04

Bluefish เป็นโปรแกรม ฟรี และ open source เป็น text editor ที่มาพร้อมเครื่องมือมากมายสำหรับ programming ในการสร้างเวป. รองรับ HTML, XHTML, CSS, XML, PHP, C, C++, JavaScript, Java, Google Go, Vala, Ada, D, SQL, Perl, ColdFusion, JSP, Python, Ruby และ shell.


1. เริ่มจากเปิดโปรแกรมเทอร์มินอลขึ้นมา Crlt+Alt+T แล้วพิม PPA ตามด้านล่าง

sudo add-apt-repository ppa:klaus-vormweg/bluefish
 
2. จากนั้นทำการอัพเดท
 
sudo apt-get update
 
3. ติดตั้งโปรแกรม
 
sudo apt-get install bluefish
 
 
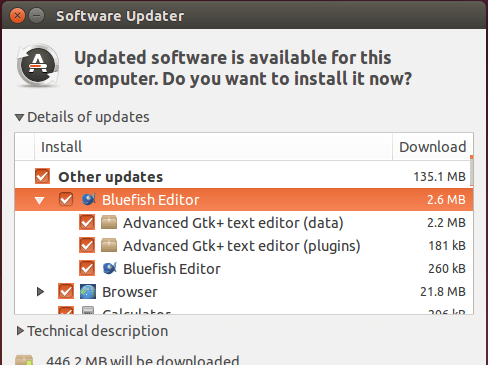
ถ้ามีการติดตั้งมาก่อนหน้านี้ ก็จะมีหน้าต่างอัพเดทขึ้นมา ให้อัพเดทตามปกติ จากวันที่เขียนบทความ version อยู่ที่ 
2.2.10 ถ้าติดตั้งปกติจาก repo ubuntu จะได้ 2.2.5


วันพุธที่ 7 กุมภาพันธ์ พ.ศ. 2561

วิธี add language Thai สำหรับ XP ที่ไม่มีภาษาไทย โดยไม่ต้องพึ่ง !! CD/DVD

Download
**ดาวโหลดโปรแกรมจำเป็น**

วิธี add thai เริ่มกันเลย

-ดับเบิ้ลคลิ๊กที่ไอคอน Add Thai ระบบจะเริ่มกระบวนการติดตั้งทันที


-ระบบจะถามหาไฟล์ที่อยู่ในโฟลเดอร์ i386 ในแผ่น Original CD ให้คุณคลิ๊ก OK , คลิ๊ก Browse...


-เลือกที่โฟลเดอร์ i386 แล้วเลือกไฟล์ที่ระบบถามถึง ซึ่งเห็นโดยอัตโนมัต คลิ๊ก Open


-ในระหว่างที่ระบบกำลัง copy file อยู่นั้น Windows บางแผ่นจะมีหน้าต่าง Confirm File Replace ขึ้นมาใหคลิ๊กที่ No to All


-ระบบจะถามหาไฟล์อีกก็ไปเลือกที่โฟลเดอร์ i386 คลิ๊ก Open คลิ๊ก OK เหมือนกับไฟล์แรก รอจน copy file เสร็จ


-ดับเบิ้ลคลิ๊กที่ Shortcut Regional and Language Options ในโฟลเดอร์ Add Thai Language

ไปที่ แท็บ Advanced แล้วก็ปรับตามรูปด่านล่าง


ที่แท็บ Languages คลิ๊ก Details


-ที่แท็บ Settings คลิ๊ก Add


-ปรับตามรูป


-คลิ๊ก OK


-ที่แท็บ Regional Options ปรับตามรูปในกรอบ เสร็จแล้ว คลิ๊ก OK


-ระบบจะถามหาไฟล์อีกก็ไปเลือกที่โฟลเดอร์ i386 คลิ๊ก Open คลิ๊ก OK เหมือนกับช่วงแรก

ทำเหมือนกันช่วงแรก ถ้ามันถามอีก ก็ ทำอย่างเดิน


-เมื่อระบบได้ไฟล์ครบแล้วจะมีหน้าต่างถามว่าจะ Restart เลยหรือไม่ คลิ๊ก Yes ครับ


-หลังจาก Restart แล้วดับเบิ้ลคลิ๊กที่ Shortcut Regional and Language Options ในโฟลเดอร์ Add Thai Language อีกครั้ง

แท็บ Languages
ทำตามรูป


-ขั้นตอนสุดท้ายแล้ว.........ดูตามภาพ

คลิกขวาที่แท็บ tastbar ว่างๆ แล้วก็ทำตามภาพรุยยยยย


วันจันทร์ที่ 2 กุมภาพันธ์ พ.ศ. 2558

สลับภาษาไทย อังกฤษ บน key board ด้วยตัวหนอน (grave accent) Ubuntu และ Mac OS X

เนื่องจากคนไทยส่วนใหญ่ใช้งานคอมพิวเตอร์ระบบปฎิบัติการ Windows และจะคุ้นเคยกับการสลับ keyboard ไทยและอังกฤษด้วยปุ่มตัวหนอน ~ หรือ grave accent
แต่ในระบบปฏิบัติการ Ubuntu และ Mac OS X จะใช้ปุ่มอื่นเพื่อสลับภาษา จึงอาจก่อให้เกิดความไม่สะดวกกับผู้ใช้บางคน
วันนี้จึงขอแนะนำวิธีการทำให้ Ubuntu และ Mac OS สามารถสลับภาษาไทยและอังกฤษของ key board ด้วยปุ่มตัวหนอน
(change keyboard layout with grave accent)
เริ่มกันที่ Ubuntu
  • download xkb-data-grave.zip สามารถ download ได้จากที่นี่ donwload
  • เมื่อ download เสร็จแล้ว แตก zip file ออกมา ทำการติดตั้ง xkb-data-grave.deb โดยการ doble click xkb-data-grave.deb
  • Ubuntu Software Center จะถูกเปิดขึ้นมา ทำการติดตั้ง xkb-data-grave
  • เมื่อติดตั้งเรียบร้อยแล้วให้ไปที่ System > Preferences > Keyboad
  • ที่หน้าต่าง Keyboard Preferences เลือก tab Layout แล้ว click Option…
  • click Layout Switching
  • เอา check ที่มีอยู่ออกให้หมด
  • เลือก grave switches layout
  • click ปุ่ม Close ปิดหน้าจอต่างๆ ที่เปิดขึ้นมา
เพียงเท่านี้เราก็สามารถสลับ keyboard ไทยและอังกฤษด้วยตัวหนอนบน Ubuntu ได้แล้ว
ต่อไปมาทำที่ Mac OS X กันบ้าง
  • download  โปรแกรม KeyRemap4MacBook download ได้จากที่นี่ download
  • ติดตั้ง KeyRemap4MacBook บนเครื่อง Mac
  • เปิด System Preferences
  • ในหมวด Other ด้านล่างสุด click KeyRemap4MacBook
  • click ที่ Change Backquote Key
  • click เลือก Backquote to F8
  • ไปที่ System Preferences ในส่วน Keyboard
  • เลือก tab Keyboard Shortcuts
  • เมนู Keyboard & Text Input เลือก Select the previous input source ให้เป็น F8
  • ตรวจสอบว่า ใน Tab Keyboard ตรง Use all F1 F2… ไม่ได้ถูก check ไว้
ลองกดปุ่มตัวหนอนก็จะเป็นการสลับภาษาไทยและอังกฤษ
http://blog.phaisarn.com/node/846

วันเสาร์ที่ 12 กรกฎาคม พ.ศ. 2557

Install SDK ADB tool on UBUNTU

#!/bin/bash #Made by android4ever91 @ XDA-Developers.com sudo apt-get install openjdk-6-jre openjdk-6-jdk icedtea6-plugin wget http://dl.google.com/android/android-sdk_r20.0.3-linux.tgz tar -xvzf android-sdk_r20.0.3-linux.tgz mv android-sdk-linux sdk cd sdk/tools ./android #Update path sudo echo '#AndroidDev PATH export PATH=${PATH}:~/sdk/tools export PATH=${PATH}:~/sdk/platform-tools' >> .bashrc #Update 51-android.rules sudo echo 'SUBSYSTEM=="usb", ATTRS{idVendor}=="0bb4", MODE="0666" SUBSYSTEM=="usb", ATTRS{idVendor}=="0502", MODE="0666" SUBSYSTEM=="usb", ATTRS{idVendor}=="12d1", MODE="0666" SUBSYSTEM=="usb", ATTRS{idVendor}=="1004", MODE="0666" SUBSYSTEM=="usb", ATTRS{idVendor}=="22b8", MODE="0666" SUBSYSTEM=="usb", ATTRS{idVendor}=="04e8", MODE="0666" SUBSYSTEM=="usb", ATTRS{idVendor}=="0fce", MODE="0666" SUBSYSTEM=="usb", ATTRS{idVendor}=="0489", MODE="0666" SUBSYSTEM=="usb", ATTRS{idVendor}=="18d1", SYMLINK+="android_adb", MODE="0666" SUBSYSTEM=="usb", ATTRS{idVendor}=="04e8", MODE="0666", GROUP="plugdev"' >> /etc/udev/rules.d/51-android.rules sudo reboot

วันจันทร์ที่ 20 มิถุนายน พ.ศ. 2554

วิธี Clear counter canon IP1880/1980


Waste Ink Counter Reset  Manual for Service mode ขั้นตอนการเข้า SERVICE MODE1. ปิดเครื่องพิมพ์ แล้วดึงปลั้กออก
2. กดปุ่ม Power ค้างไว้ และ เสียบปลั้ก
3. จากนั้น ให้ใช้นิ้ว กดปุ่ม RESUME 2 ครั้ง โดย
4. กดครั้งที่ 1 ไฟจะขึ้นสีส้ม
5. กดครั้งที่ 2 ไฟจะขึ้นสีเขียว
6. เมื่อทำตามขั้นตอนเรียบร้อยเครื่องจะเข้าสู่ Service Mode เพื่อเคลียร์ด้วยโปรแกรม
ขั้นตอนการใช้โปรแกรม GENERAL TOOL
1.  เรียกโปรแกรมขึ้นมา โดยเข้าไปที่ General Tool MFC Appication แล้วกำหนด Port USB, Set Destination
2. เลื่อนเม้าส์ ไปคลิ๊กเครื่องหมายถูกที่ช่อง  CLEANING  และ  EEPROM CLEAR จากนั้น
3. ให้ใส่กระดาษ 1 แผ่น แล้วกดปุ่ม TEST PETTERN 1 จากนั้นเครื่องจะทำการ RUN แล้วพิมพ์ออกมา 1 แผ่น เป็นอันเสร็จสมบูรณ์
Reset Counter canon MP145,MP150, MP160, MP170, MP180, MP450 and MP460 แบบ Manual

วิธีเคลียร์ซับหมึก (ตัวซับน้ำหมึกเปล่าประโยชน์ต็ม E27)
1. ปิดเครื่อง
2. กดปุ่ม Stop/Reset ค้างไว้ และตามด้วยปุ่ม ON/OFF ค้างตาม
3. ในขณะที่ยังกดปุ่ม ON/OFF ค้างอยู่ ให้ปล่อยมือจากปุ่ม Stop/Reset
4. ยังกดปุ่ม ON/OFF ค้างอยู่ ให้กดปุ่ม Stop/Reset อีก 2 ครั้ง เสร็จแล้วปล่อยมือจากปุ่มทั้ง 2 ปุ่ม
5. ไฟสีเขียวจะกระพริบสักพักแล้วจะหยุด
6. เมื่อไฟกลายเป็นสีเขียวค้าง กดปุ่ม Stop/Reset 4 ครั้ง
7. กดปุ่ม ON/OFF เพื่อปิดปริ๊นท์เตอร์ (บางทีอาจต้องกด 2 ครั้ง เพื่อปิด)
8. เปิดปริ๊นท์เตอร์ ก็จะใช้งานได้ตามปกติ


วิธีรีเซตตลับหมึกให้โชว์ สถานะเต็ม เครื่องฟ้อง E16  ให้ทำตามนี้
1.ถอดปลั๊ก เครื่องพิมพ์ออก
2.กดปุ่ม Power ค้างไว้
3.เสียบปลั๊กเครื่องพิมพ์
4.กดปุ่ม Stop/Reset 2 ครั้ง ปล่อยปุ่ม Power (ครั้งที่ 2 ปล่อยปุ่มพร้อมกัน )
5.หน้าจอจะขึ้นเลข ? 0 ? กดปุ่ม ? + ? 1 ครั้ง หน้าจอจะขึ้นเลข ? 1 ?
6.กดปุ่ม Star Color 2 ครั้ง และกดปุ่ม Power 1 ครั้ง รอกระดาษ Test ออกมา 2 แผ่น
กดแล้ว ต้องรอนานหน่อยนะค่ะ รอจนกว่ามันจะพิมพ์
7.เปิดฝาเครื่องพิมพ์ รอหัวพิมพ์เลื่อนมาทางซ้าย กอดปลั๊กออก และถอดตลับหมึกออกทั้งดำและสี
8.ปิดฝาเครื่องพิมพ์ เสียบปลั๊ก แล้วเปิดเครื่อง (กดปุ่ม Power)
9.เครื่องจะเรียกหาตลับหมึก ให้เปิดฝาเครื่องแล้วใส่ตลับหมึกทั้งสอง ปิดฝาหน้าจอขึ้นเลข 1 OK. พร้อมใช้งาน ลองดูทำดูค่ะ


ที่มา อุ่ย หายไปใหน

วันอาทิตย์ที่ 5 มิถุนายน พ.ศ. 2554

TeraCopy Pro 1.22

TeraCopy Pro 1.22  โปรแกรมย้ายข้อมูลเร็วกว่า windows 10 เท่า 


http://www.fileserve.com/file/NmeUjbr

วันศุกร์ที่ 20 พฤษภาคม พ.ศ. 2554

* Multiple Server Setup Guide * (CS:S dedicate Server

* Multiple Server Setup Guide *

If you would like to support multiple servers/configs running on the same host, there are a few things you need to do:

  1. Launch each server on a separate port, this should be done 20 ports higher than the previous server.
    So if we have server 1 on port 27015, the next one should use port 27035.
  2. Have our server use separate configuration files (This includes server config and mapcycle/motd files, if desired).
Introduction
We are going to create in this example two servers. Server one will be called 'Example #1 - Dust Only' which will only run the popular Dust map, and server 2, 'Example #2 - All Maps', which will run every map in our rotation.
Each of these two servers will have a different map rotation and configuration file, and both will be running CS: Source.
To have this guide work for hl2 deathmatch servers, simply replace references to 'cstrike' with 'hl2mp'.

Important: You must either DELETE cstrike/cfg/server.cfg from your servers game directory in order for this setup to work correctly, OR, have the files contents only contain:


Code:
exec banned_ip.fg
exec_banned_user.cfg
Or any other generic commands that would be executed on all servers.

This is because server.cfg is executed on every map change by srcds, and you cannot tell srcds NOT to execute the file, so to prevent settings in this file overwriting our multiple server config files, we either delete the file itself, or just leave the banned commands in (so the banlists are executed on map change).

It is best to just erase the file and leave:


Code:
exec banned_user.cfg
exec banned_ip.cfg
In the file, so any changes to the banfile contents will be re-read on map change if the contents are changed.

It is also safe to simply delete this file, but you will not have the benefit of the banned list files being re-read on each map change.

Step 1
If not already done, delete cstrike/cfg/server.cfg

Step 2
Now we create server 1's configuration file. Create a new file called server1.cfg in cstrike/cfg (So its accessable in cstrike/cfg/server1.cfg).

Heres what it looks like in our example:
Items in bold you should take note of, as you should change these values in each config file you make for multiple servers.


Code:
// server name
hostname "Example #1 - Dust Only"

// server admin (rcon) passsword
rcon_password "adminpass"

// server join password
sv_password ""

// Advanced RCON
sv_rcon_banpenalty 15
sv_rcon_maxfailures 5
sv_rcon_minfailures 5
sv_rcon_minfailuretime 30

// server cvars
mp_footsteps 1

// only allow 1 player difference between teams
mp_limitteams 1
mp_autoteambalance 1

mp_autokick 0
mp_flashlight 1
mp_tkpunish 1
mp_forcecamera 0
sv_alltalk 0
sv_pausable 0
sv_cheats 0
sv_consistency 1
sv_allowupload 1
sv_allowdownload 1
sv_maxspeed 320
mp_limitteams 2
mp_hostagepenalty 5
sv_voiceenable 1
mp_allowspectators 1
mp_chattime 10
sv_timeout 65

// round specific cvars
mp_freezetime 4
mp_timelimit "25"

mp_roundtime "3"
mp_maxrounds "20"
mp_startmoney "800"
mp_c4timer "45"
mp_fraglimit 0
mp_maxrounds 20
mp_winlimit "10"
mp_playerid 0
mp_spawnprotectiontime 5
mp_friendlyfire "0"

// bandwidth rates/settings
sv_minrate 3000
sv_maxrate 20000
decalfrequency 60
sv_maxupdaterate 100
sv_minupdaterate 30

// server logging
sv_logbans 1
sv_logecho 1
sv_logfile 1
sv_log_onefile 0

//Specify that we want this specific servers logs placed in a folder called logs/server1
//to separate them from another servers logs
sv_logsdir "logs/server1"
log 1

// operation
sv_lan 0
// region the server should appear in under the steam browser
sv_region 0
sv_contact "www.example.com"


// map cycle for this server
mapcyclefile "mapcycleserver1.cfg"

// motd file for this server
// Note: You could simply have this as motd.txt in all config files, so that all servers share the same config file
// This is just an example so you know how to specify individual ones if necessary
motdfile "motdserver1.txt"


// execute our banned suer files
exec banned_user.cfg
exec banned_ip.cfg


// launch our starting map, in this case, de_dust
map de_dust
To review our first servers config file, we have set it up as to have:
  1. A hostname of "Example #1 - Dust Only"
  2. Place all log files for this server in the folder logs/server1 (If this directory does not exist at runtime, it will be created by srcds)
  3. Use the map cycle listed in cstrike/mapcycleserver1.cfg
    Note: Its cstrike/ not cstrike/cfg/ for map cycles and motd files)[/b]
  4. Use a MOTD (Message of the Day, the welcome screen you get when joining your server) in cstrike/motdserver1.txt (Once again, cstrike/ not cstrike/cfg/ for this file)
  5. And launch our starting map, cs_office
Next, we create this servers map cycle and message of the day screen.

Create cstrike/mapcycleserver1.cfg (As per our config file we just made) and in it we would have:

Code:
de_dust
Just one map name to cycle through, since this is our dust only server.

Next, create our MOTD file in cstrike/motdserver1.txt

Code:
Welcome to my 24/7 Dust only server!
You can use simple text based MOTDs as above, or use HTML code to create web based MOTDs.

Code:
<html>
<b>Welcome to my 24/7 Dust only server!</b>
</html>
Obviously you would use something more creative here and easier on the eye, you can include all forms of html formatting tags (tables, divs, background colours etc).

Alternativly, you can specify a URL in the MOTD file on its own line as follows:


Code:
http://www.mydomain.com/motd.html
And CS: Source/HL2: DM will actually load the file from that address given and display it to the user, so you can update your MOTD externally from your servers.

Step 3
Time to launch our newly created server.

To confirm the directory and file structure, you should have:
~/srcds_l/srcds_run
~/srcds_l/steam
~/srcds_l/cstrike/motdserver1.txt
~/srcds_l/cstrike/mapcycleserver1.cfg
~/srcds_l/cstrike/cfg/server1.cfg

Notice how only the server configuration file is in the /cfg folder, the other two files reside in the /cstrike folder.

To launch our server, now type from ~/srcds_l:

Code:
./srcds_run -console -game cstrike -port 27015 +ip 123.123.123.123 +map de_dust +maxplayers 14 +exec server1.cfg
Our command line has the following parameters:

Code:
-console
--> Enable console mode/view

-game cstrike
--> Which game we are making a server for (cstrike or hl2mp)

-port 27015
--> Which port this server should be accessable on. We are using the default of 27015 for our first server.

+ip 123.123.123.123
--> Bind IP Address of this server. This should be your external IP Address, not LAN address.
--> Having this set incorrectly could cause people not being able to join your server, or have 'RCON Not working' via HLSW or ingame console (Connection refused errors).

+map de_dust
--> Which map to start the server on, we already have this defined in our config file, but we do it again in the command line for good measure.

+maxplayers 14
--> How many players may join this server.

+exec server1.cfg
--> The almighty configuration file for this server, we tell srcds to execute this file on startup and load the servers settings.
Your dedicated server should now be operational.

To create our second server, we would repeat the above steps, but instead of creating motdserver1.txt, mapcycleserver1.cfg and server1.cfg, we would call the files motdserver2.txt, mapcycleserver2.cfg and server2.cfg

Then, we would launch the server like so:

Code:
./srcds_run -console -game cstrike -port 27035 +ip 123.123.123.123 +map de_dust +maxplayers 14 +exec server2.cfg
There are two important changes in this command line for our second server.
The -port command now has a parameter of 27035 (thats 20 ports higher than our first server, 27015).
You cannot simply have the next server one port higher, as srcds uses several ports higher for other services than its game port. 20 ports is a safe number to use.

Secondly, we now have +exec server2.cfg, telling the server to execute server2's configuration file, loading a different set of preferences and settings, map rotation and motd file.

To setup the second server, our configuration file would be the same as server1's except we would change thehostname, sv_logsdir, mapcyclefile and motdfile variables to accomodate a different set of settings.

In our mapcycle file for server 2, instead of listing just de_dust (which was our mapcycle for server #1's 'Dust only' server), we would list all of the maps on a new line such as:

Code:
de_dust
de_port
cs_office
...etc
Once the server reaches the end of the rotation, it starts from the top again.

Thats all!
I hope this guide has been helpful.

Creating a Counter-Strike: Source/Half-Life 2: Deathmatch Server Linux Setup Guide


Creating a Counter-Strike: Source/Half-Life 2: Deathmatch Server
Linux Setup Guide

- By Plasma

Step 1
Create a folder called srcds_l (Thats a lower case L for linux!), usually done in your home directory, where you want to base your server installation and have all content stored.

Step 2
Grab hldsupdatetool and put it in your srcds_l directory you just created.


Step 3
Make the hldsupdatetool executable via chmod.


Code:
chmod +x hldsupdatetool.bin
Step 4
Run hldsupdatetool - This just extracts our steam client.

Code:
./hldsupdatetool.bin
Say YES to agree to the following license prompt and your done.

Step 5
Now we will run the Steam client to download the game content.

Two game types are available:

For CS: Source, its: "Counter-Strike Source"
For HL2: Deathmatch, its: "hl2mp" (HL2 Multiplayer, not HL2DM).

To download CS: Source data files for a CS: Source server, type:

Code:
./steam -command update -game "Counter-Strike Source" -dir .
Hit ENTER and you should begin downloading the Counter-Strike Source data files in this directory (~/srcds_l).

This may take a while.

Note: Contrary to what typing ./steam on its own indicates, you DO NOT need to specify OR create a Steam account to download/update your servers.
This was originally a requirement but Valve have since removed it, and the help information has just not been removed from the Linux Steam client.

Once its finished, you will be able to then launch your dedicated server, this will create our initial config file and test everything is ok.

Step 6
Launching a dedicated server. We will launch a server with no determined config to see if everything was successful, and to create an initial config file in cstrike/cfg/server.cfg

Using our example from Step 5, to launch a CS: Source server you type:

Code:
./srcds_run -console -game cstrike -port 27015 +ip 123.123.123.123 +map de_dust +maxplayers 14
Replace 'cstrike' in the above launch command with 'hl2mp' (MP! Not DM) to launch a HL2 Deathmatch server.

Be sure to replace 123.123.123.123 with the EXTERNAL IP you want your server to bind to, not the servers Internal/LAN IP.

Congradulations, your server should now be running!

Step 7
Edit your server configuration to your liking in cstrike/cfg/server.cfg
If it does not exist, create it.

Note: Read the following post in this thread if you would like to know how to setup multiple servers on the same host.

Additionally, you may want to launch your server as follows:

Code:
screen -S css ./srcds_run -console -game cstrike -port 27015 +ip 123.123.123.123 +map de_dust +maxplayers 14
To place the server in a screen session you may detach from once its launched, or place the line in start_server.sh and exeucte it from the command line.

Step 8
Once your all set, in the event a Steam/game update has been released, you will need to update your hlds installation.
To do this, simply run the command we used in Step 5 to initially download our content:

Code:
./steam -command update -game "Counter-Strike Source" -dir .
This will update all files if needed in your installation directory to their latest versions.

Adding a cronjob for this command may be wise so you do not have to constantly remember to update your servers, and that they would be up to date within 24 hours of an update if scheduled to run daily.